Do you need a little affordable favor for a Mexican themed party? Even if you have no crafting experience you can make one of these little corn husk mules! Traditionally these mules are made out of dry palm leaves, but here I'm using corn husks, widely available at Hispanic markets. You could also use stiff crepe paper, if you can't find corn husks. These little mules are easy enough for kids to make with adult supervision, the design can be adapted to create other animals. Scroll down for instructions.

The tradition:
I remember street vendors selling dozens of little mules in a variety of sizes around June the 11th, while I was growing up in Mexico City. The origin of the "Day of the Mules" tradition is obscure. I heard it originated when church goers saw a mule kneel down during mass. The believers were amused so they decided to remember mules on the Thursday before the feast of Corpus Christi.
Villagers would also bring their wares to the city on the back of mules, in order to celebrate this feast and sell their merchandise, so maybe that is how the celebration ended up being associated with these animals.
I believe there could also be an older pre-hispanic tradition having to do with the summer harvest but I haven't been able to find much information. Whatever the reason, I think it is a charming tradition to keep alive. To make your "mulitas" you'll need the following materials:
- One bag of dry corn husks, traditionally used to make tamales
- Several strands of raffia
- Embroidery floss
- Sticky glue (I use Eileen's)
- Match sticks
- Scissors
- Miniature embellishments (mini pots, dry flowers, beads, glitter, etc.)
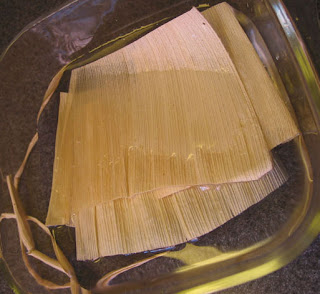
Start by soaking the corn husks in water for about 30 minutes until they become soft and pliable. For mule that is about 3 inches tall you'll need two to three husks

Once the husks are soft, dry them with a towel. Trim the pointy ends with scissors. Start by rolling one husk in order to create a cylinder as thick as a pencil or a drinking straw. Corn husks have veins. It is easier to roll the husks in the direction of the veins, not against them.
 Once your husk is rolled tie one end with the embroidery floss in order to create a snout. Trim with scissors. Bend the end of the cylinder to create a head.
Cut a piece of husk and fold it under the head you just created. Pull the ends up in order to create the mule's ears.
 Tie the "ears" together with a piece of raffia. This will create the mule's face and will keep everything in place.
 Tie the raffia tightly behind the head, them trim the ends. Secure the knot with a little bit of glue. Trim the ears with your scissors and make them pointy.
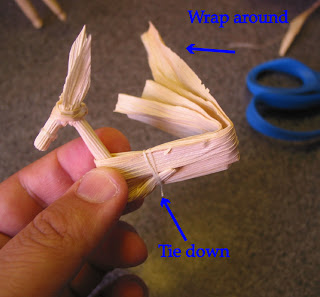
Take another husk and wrap it around the neck of your mule. Tuck the rest of the neck under the body you just created.
 Securely tie down the mule's body and neck. Wrap the rest of the husk around to the front of the body.
 Wrap everything together tightly and tie once again. If necessary add more leaves to bulk up the body.
 Cover a match stick with sticky glue and wrap around the end of it with a piece of corn husk. Tie one of the ends to crate "hoofs". Do this four times.
Add a dot of glue to an end of the match and stick it to the body of the mule, to create the legs. If necessary sharpen the match sticks a little bit with an x-acto knife. Don't forget to supervise kids and keep them away from sharp objects.
 Repeat the process with all the legs. Stand your mule up and pose it to your liking. You can manipulate the legs while the glue is still wet.
 Take small pieces of corn husk and raffia and wrap them around the neck and extremities in order to strengthen the pieces if necessary. You can also create a tail with raffia if you want. You now have a basic mule ready to decorate!
 The miniature basket and shovel come from "Create-a- Mission", suppliers of school project materials. The mini pottery is from Mexico, but you can easily create some with self-hardening clay available at craft stores. I also use yarn and fabric scraps to create mini saddles, and match sticks to make a crate. Have fun creating your mules!


No comments:
Post a Comment